The iterative mode enables you to sequentially run the same process on several input data. This is very similar to a batch mode, with a user-friendly interface. This means that, for each input file selected, you can adjust the parameters as required. For example, if you are converting several DICOM volumes, some can be converted to GIS format (.ima and .dim), and others can be converted to NIFTI format (.nii). This a very practical mode as it makes it possible to repeat the same process using different parameters (or not), on a group of input files. For instance, you can apply exactly the same process to all the brain images in a given protocol.
To use the iterative mode, follow the instructions below:
Open the process or if you don't need to change a parameter for all processes, you can use the contextual menu Iterate and go directly to step 4.
If necessary, modify a parameter, which will remain the same for all the repeated processes.
Press the Iterate button on the bottom right. A new window opens.
In the new window, select the input files with
 or
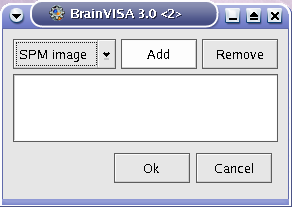
or  . When you select the files in the filesystem with an additionnal interface appears enabling to select the files in several steps wich is useful when the files are in different directories. This list editor is also available from the icon through a right-click on the button. The list editor also enables to add, remove items and change their order in the list.
 If necessary, modify the process parameters of each iteration using
 . Note that the number of iterations with a given parameter should be equal to the number of input files. But if you set only one value, BrainVISA will use this value for all iterations.
Once the input files and the parameters have been configured, press Ok.
A new window appear, it is a pipeline composed of n iterations of the process. Via this new interface, you can view each process individually. You can also check or modify parameters.
You can deselect processes if you do not want them to be run. See the paragraph about pipelines user interface for more details about the possible actions.
All you have to do now is press Run to run all the processes. You can monitor the sequence of processes in the bottom part of the window. If an error occurs during a process, the iterative mode will go on to the next process.
Note
If Soma-workflow is available in your version of Brainvisa, a new button Run in parallel may be available. This feature enables to execute the processes of the iteration faster than before using available computing resources. More information about this feature in the chapter Parallel computing with Soma-Workflow.Parameters can be modified at 3 levels:
Via the general interface of the process that you wish to iterate: this modification will then be applied to each instances.
Via the iteration dialog: use
. As mentioned above, the number of iterations for a parameter
must be equal to the number of input files, if you select only one value, this value will be used for each instances. Each parameter value will be applied to the process, depending on the input files order. Via the iteration process window: you can modify the process parameters individually. The modification will only be applied to the current process.
In this example, we wish to convert 6 GIS images (.ima and .dim) in a database to NIFTI format (.nii).
Select the conversion process: Tools -> converters -> Aims Converter.
Select the preferredFormat parameter (NIFTI-1 image).
Start up the iterative mode by clicking Iterate button.
A new window is displayed:
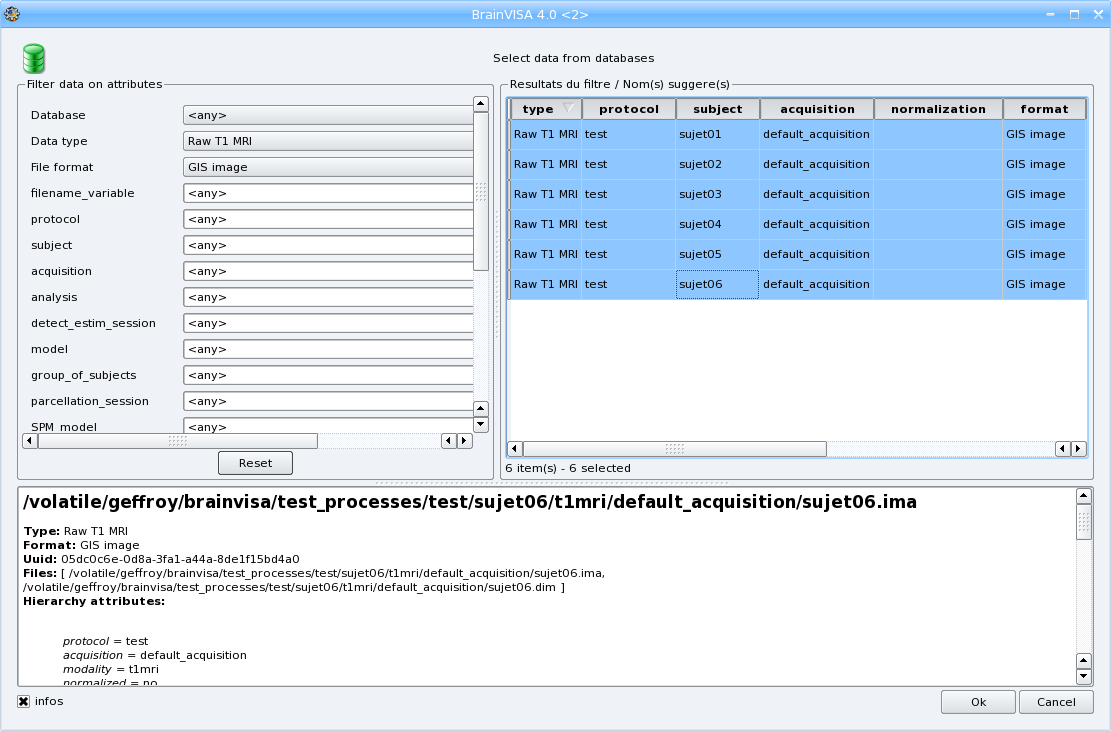
Select the volumes on which you want to run the process by clicking
. A database file selector is displayed. Select 6 Raw T1 MRI (filter on the type). To select several files, use the
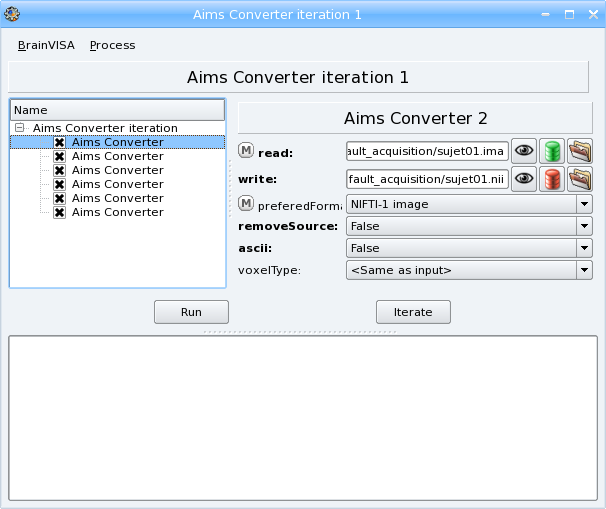
Ctrl + left click combination.Click the Ok buttons in windows 3 and 2. A new window, containing all the processes appears.
If you want, you can still modify the process parameters if necessary.
To start the iteration, click Run
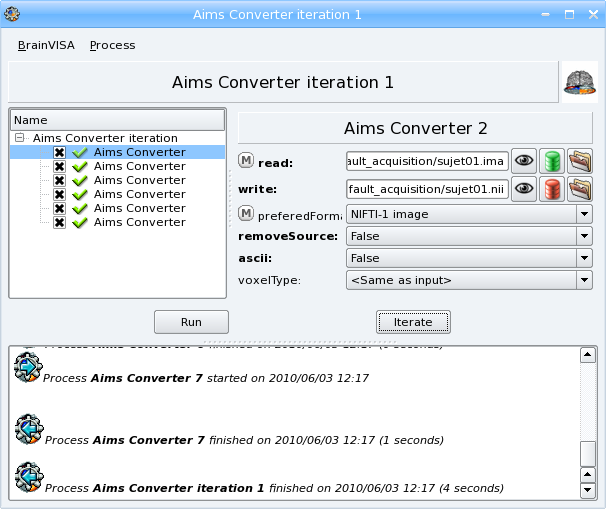
When the iteration is finished, the following window is displayed:


To select the value of a parameter in relation to the input values (i.e. value of preferredFormat in relation to value of read), you can proceed this way :
After the fifth step, click on Ok button to return to window 2 :
Click on
of preferredFormat parameter Select the nth preferredFormat parameter in relation to nth read parameter with the menu:
Click on Add (this selection of preferredFormat parameter corresponds to the first read parameter) :
Do the same to select the value of the parameter in each iterations.
Click on Ok button in windows 3.5 to return to the 6th steps :
Click on Ok button in windows 3.6 to return to step 6