Editor: Animation Director ()
The Animation Director allows for creating one or multiple animation sequences based on the current Project. This Animation Director is introduced with 7.1 and replaces the deprecated Demo Maker module.
With this new component the user can create animations in a very simple and easy way by just clicking on a button in the Properties Area of a module or by using the Animation Director user interface.
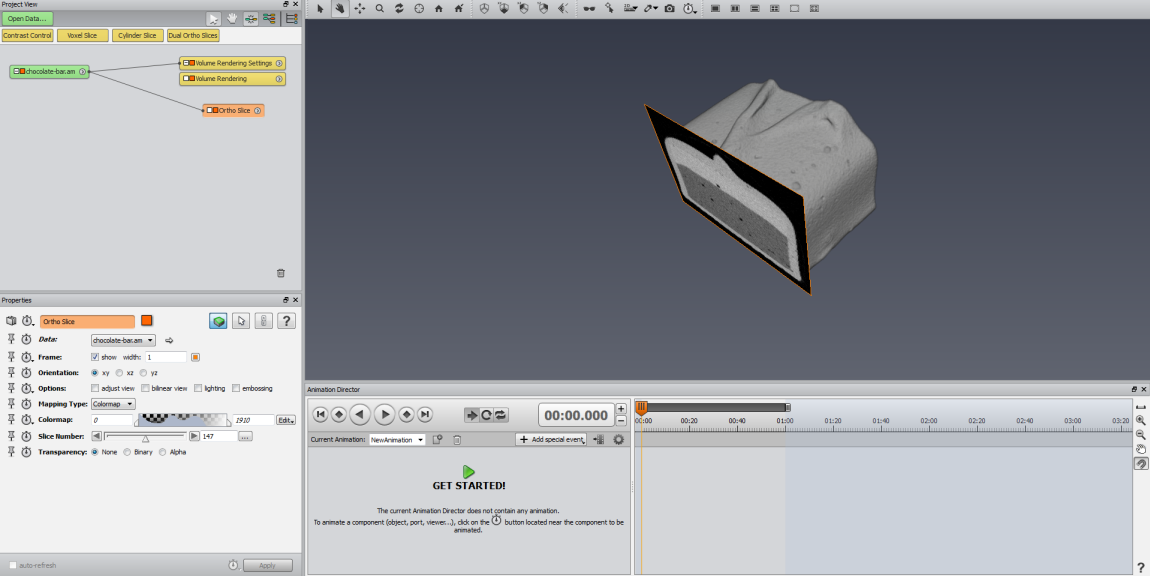
| Figure 1: The Animation Director within |
The Animation Director is activated and deactivated by pressing the ![]() Animation Director button (2) in the toolbar like it can be done for activating and deactivating the Colormap Editor widget (In case either of the buttons labeled "Colormap" nor "Animation Director" cannot be located, it must be made sure that the Standard Toolbar is visible by right-clicking on the menu bar area and checking the content of the popup menu. There must be a checkmark in front of the entry labelled "Standard").
The Animation Director comes in form of a widget (1) that, like all other widgets in , is dockable. When first activated, the widget will be located underneath the main viewer window.
Animation Director button (2) in the toolbar like it can be done for activating and deactivating the Colormap Editor widget (In case either of the buttons labeled "Colormap" nor "Animation Director" cannot be located, it must be made sure that the Standard Toolbar is visible by right-clicking on the menu bar area and checking the content of the popup menu. There must be a checkmark in front of the entry labelled "Standard").
The Animation Director comes in form of a widget (1) that, like all other widgets in , is dockable. When first activated, the widget will be located underneath the main viewer window.

| Figure 2: The Animation Director widget |
The Animation Director widget is composed of

With the Controller Panel the user can start and stop the animation or jump backwards and forwards. This is done with the VCR like controls to the left of the panel:
 |
Jump to the beginning of the animation. 00:00.000 in most cases. |
 |
Jump to previous keyframe. |
 |
Play animation backwards. |
 |
Play animation forwards. |
 |
Jump to next keyframe. |
 |
Jump to end of animation. |
With help of the control in the middle of the panel the user can determine how the animation is played:
 |
Play the animation once. |
 |
Loop the animation. |
 |
Play the animation forwards and backwards (swing). |
The time control to the right of the panel is used to adjust the time of the animation. This control is organized in minutes:seconds.milli-seconds. The time can be entered directly into the control or it can be adjusted by clicking on the + and - buttons. The time can also be adjusted by dragging the time slider.

With the controls to the left of the toolbar the user can select, rename, add or remove animations from the project. Animations can be selected by picking on one out of the elements listed in the drop-down list. To rename an animation the user can simply double click on the current name and enter a new name for the animation. An animation can be added or removed by clicking on the appropriate button:
 |
Add a new empty animation to the project. |
 |
Remove the current animation from the project. Note: This cannot be undone. |
Clicking on the + Add special event button enables a drop-down list and lets the user add special events to the event list:
 Add Pause Add Pause |
Add a pause to the event list, where the animation will stop and wait for a user-defined amount of time. Note: Such a pause will not be executed if Animation Director is creating a movie with the Movie Maker module. |
 Add Break Add Break |
Add a break to the event list. When playing, the animation will stop at that point until the key [F4] is hit. |
 Add Goto Add Goto |
Jumps to user-specified time in the animation. This can be used to define an endless loop by jumping back to some previous time. Such an endless loop can be stopped by clicking on the stop button or by pressing the key [F3]. |
 Add Tcl Command Add Tcl Command |
Insert an arbitrary Tcl command into the animation. |
 Add Snapshot Add Snapshot |
Triggers a snapshot at the given time. The snapshot will be stored in the folder that can be specified in the settings panel. The settings panel can be accessed by clicking on the More Options button. |
Clicking on the  Movie Creation button will show the embedded Movie Maker user interface:
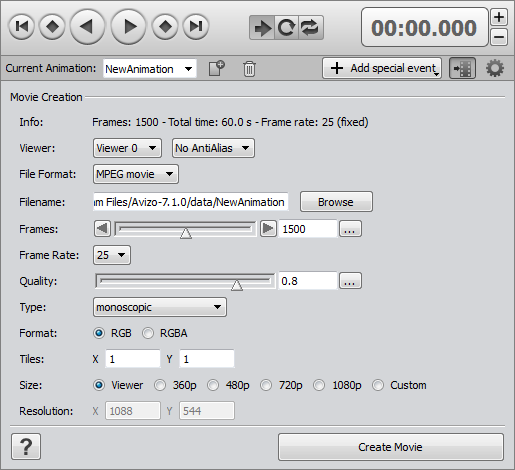
Here the user can adjust the settings for the movie and finally trigger the creation of the movie. For more information please refer to the Movie Maker help section.
Clicking on the  More Options button will show the settings for the current animation:
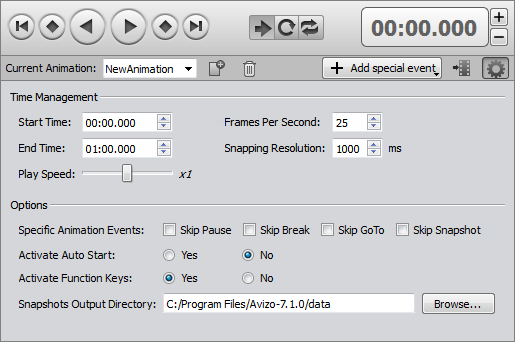
Within the time management section of the settings panel the user can adjust the start and the end time of the animation. Furthermore the settings for FPS (Frames Per Second), the resolution for the snapping of the time slider and the play speed of the animation can be set.
In the options section of the panel the user can do further configurations of the animation:
| Specific Events | |
| Skip Pause | Do not execute user-defined pause events (no waiting time) when playing the animation. |
| Skip Break | Do not stop at user-defined breaks when playing the animation. |
| Skip GoTo | Do not jump at GoTo events when playing the animation. |
| Skip Snapshot | Do not create snapshots when playing the animation. |
| Activate Auto Start | When set to yes, the animation will start as soon as the accompanying project is loaded. |
| Activate Function Keys | When set to yes, the user can control the animation by using function keys (this is helpful when operating in full screen mode): |
| [F3] | Stop animation. |
| [F4] | Start animation. |
| [F9] | Jump to previous break. |
| [F10] | Jump to next break. |
| Snapshots Output Directory | Defines the location where snapshots that are taken during an animation are stored. |

The principle of a keyframe is that the user puts such a keyframe on the timeline where the port that is going to be animated holds a specific value. Next the user modifies the port to the targeted value and creates another keyframe on the timeline at a different time. When the animation is running, the module gets animated by interpolating the port's value over the time between subsequent keyframes. In case the component represents a state like visibility, choice, action, toggle it is of course not animated but triggered.
 button next to the component or port in the properties panel of the module that is going to be animated:
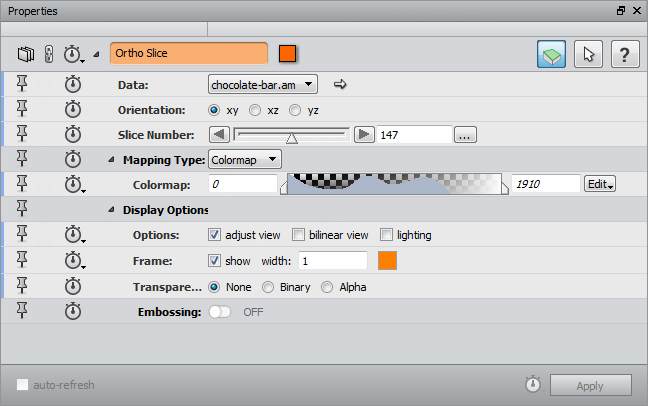
This adds a new event with an accompanying keyframe to the event list. The keyframe is positioned at the current time in the timeline and holds the current value of the module's port. For convenience, in case the current time is different than 0, a keyframe is also created at time = 0. In a next step the user can position the time slider to a different time and modify the value of the port. Finally, another click on the  button creates another keyframe in the timeline.
Once a port has been added for animation onto the event list, the user can add subsequent keyframes for this port by clicking on the  Add Keyframe button located in the line of the port in the event list:

Note: This button is not available when the time slider is positioned on one of the keyframes of this port. If the time slider is above one of the keyframes the  Add Keyframe button is replaced by a
  Delete Current Keyframe button. Clicking on this button removes the currently selected keyframe from the timeline.
Furthermore the user can add keyframes by double-clicking at the designated time and in the port's line into the timeline.
Clicking on the  symbol located in the same line as the port name will remove all keyframes that are associated with this port.
Clicking on the
  symbol located in the same line as the module name will remove all keyframes associated with the module from the timeline. This will also remove the module from the event list.
Note: Removing keyframes cannot be undone.
A keyframe can be modified by:

Positioning the mouse cursor over the semi-transparent dialog will make the dialog opaque and active:

Now the user can edit the keyframe time value, the value of the port that it is representing, or both.

Togglable ports can have an alternating state that can be expressed by on or off.

Radio ports can have one out of multiple states and can be selected at the given time.

Action ports trigger an action like inverting a clipping orientation or hitting the Apply button of a compute module.
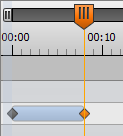
Note: The keyframe's symbol turns from gray to orange when it is selected highlighted.
Remember: The master time slider can jump to the previous or to the next keyframe by clicking on the appropriate button in the control panel or by clicking on the  previous or
  next button in the event list:

When the keyframe is selected with the master time slider, the user can change the port value by changing the value in the properties panel of the module whose port it is representing, e.g., the Slice Number slider of the Ortho Slice module:
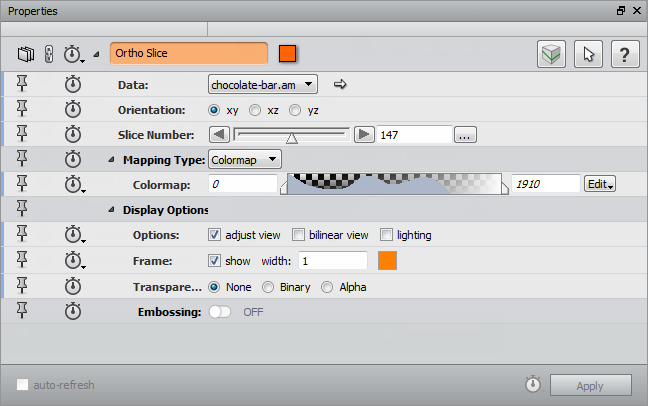
Changing the slider or entering a different value to the port by typing it will change the value for that port in the keyframe.

Dragging to the left or right will change all time values of that port in parallel.

Dragging to the left or right will change all time values of all ports of that module in parallel.
In order to enable a transition the user has to position the mouse cursor over keyframe 3 to bring up the keyframe edit dialog:

Clicking on the  Make Transition button will extend the keyframe edit dialog:

Now the user can enter the desired start value of the keyframe.

The following interpolation curves are provided:
 ) function: velocity is constant.
 ) function: accelerating from zero velocity.
 ) function: decelerating to zero velocity.
 ) function: acceleration until halfway, then deceleration.
 ) function: deceleration until halfway, then acceleration.
 ) function: accelerating from zero velocity.
 ) function: decelerating to zero velocity.
 ) function: acceleration until halfway, then deceleration.
 ) function: deceleration until halfway, then acceleration.
 ) function: accelerating from zero velocity.
 ) function: decelerating to zero velocity.
 ) function: acceleration until halfway, then deceleration.
 ) function: deceleration until halfway, then acceleration.
 ) function: accelerating from zero velocity.
 ) function: decelerating to zero velocity.
 ) function: acceleration until halfway, then deceleration.
 ) function: deceleration until halfway, then acceleration.
 ) function: accelerating from zero velocity.
 ) function: decelerating from zero velocity.
 ) function: acceleration until halfway, then deceleration.
 ) function: deceleration until halfway, then acceleration.
 ) function: accelerating from zero velocity.
 ) function: decelerating from zero velocity.
 ) function: acceleration until halfway, then deceleration.
 ) function: deceleration until halfway, then acceleration.
 ) function: accelerating from zero velocity.
 ) function: decelerating from zero velocity.
 ) function: acceleration until halfway, then deceleration.
 ) function: deceleration until halfway, then acceleration.


 ) easing in: accelerating from zero velocity.
 ) easing out: decelerating to zero velocity.
 ) easing in/out: acceleration until halfway, then deceleration.
 ) easing out/in: deceleration until halfway, then acceleration.


By default, the interpolation curve is set to Linear for a numeric property and None for a choice property. Note that, for a choice property, there is only possible to set a linear interpolation or no interpolation.
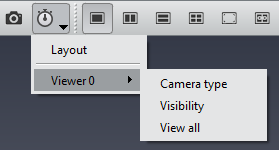
 |
The Rescale button triggers a view all onto the timeline panel. This makes sure that the complete animation timeline will fit into the panel from the beginning to the end. |
 |
The Zoom In button zooms into the timeline panel. |
 |
This Zoom Out button zooms out of the timeline panel. |
 |
When snapped, the user can pan the timeline, presumed that the timeline is in a zoom state that prevents the complete timeline from fitting into the panel. |
 |
When snapped, the snapping function of the master time slider (and the keyframes) is enabled. This makes sure that when positioning the time slider (or a keyframe), the slider jumps to a predefined interval. The interval (1.000 milliseconds by default) can be configured in the More Options panel. When disabled, the time slider (or keyframe) can be positioned arbitrarily. |
_animations removeAll
Deletes all the Animation Director instances. In case the Animation Director panel is visible, an empty Animation Director instance will be created for convenience._animations setCurrentAnimationDirector AnimationDirectorName
Sets the given Animation Director instance as the current one._animations getCurrentAnimationDirector
Returns the current Animation Director instance._animations getAllAnimationDirectors
Returns all the existing Animation Director instances.
Furthermore, several Tcl commands are also provided for each existing Animation Director instance. These Tcl commands begin with the name of the Animation Director instance they will be applied on (for instance "NewAnimation").
AnimationDirectorName getCurrentTime
Returns the current time of the animation.AnimationDirectorName setCurrentTime <Time>
Sets the current time of the animation. Time value must be given in milliseconds.AnimationDirectorName getStartTime
Returns the start time of the animation.AnimationDirectorName setStartTime <Time>
Sets the start time of the animation. Time value must be given in milliseconds.AnimationDirectorName getEndTime
Returns the end time of the animation.AnimationDirectorName setEndTime <Time>
Sets the end time of the animation. Time value must be given in milliseconds.AnimationDirectorName setTimeValues <CurrentTime> <StartTime> <EndTime>
Sets the current, start and end time of the animation. Time values must be given in milliseconds.AnimationDirectorName getTimeUpdateInterval
Returns the time update interval of the animation i.e., the time which must be elapsed between 2 time steps when playing the animation. The frame rate of the animation (i.e., the FPS) corresponds to 1000 / timeUpdateInterval.AnimationDirectorName setTimeUpdateInterval <Time>
Sets the time update interval of the animation. Time value must be given in milliseconds.AnimationDirectorName getFrameRate
Returns the frame rate (i.e., the FPS) of the animation. It corresponds to 1000 / timeUpdateInterval.AnimationDirectorName setFrameRate <FPS>
Sets the frame rate (i.e., the FPS) of the animation.AnimationDirectorName getPlaySpeedFactor
Returns the play speed factor of the animation.AnimationDirectorName setPlaySpeedFactor <Factor>
Sets the play speed factor of the animation. Factor must be one of the following: 32 | 16 | 8 | 4 | 2 | 1 | 1/2 | 1/4 | 1/8 | 1/16 | 1/32.AnimationDirectorName getCurrentPlayMode
Returns the current play mode of the animation:
- 0:
Play Once: play from begin to end once
- 1:
Play Loop: start over from the beginning
- 2:
Play Swing: play forwards, backwards and so on
AnimationDirectorName setCurrentPlayMode <0: play once | 1: play loop | 2: play swing>
Sets the current play mode of the animation.AnimationDirectorName play <0: backwards | 1: forwards>
Plays the animation from the current time, according to the current play mode. With no argument, this command plays the animation forwards.AnimationDirectorName stop
Stops the animation.AnimationDirectorName jumpToPreviousKeyframe
Jumps to the time specified by the previous keyframe in all defined animations.AnimationDirectorName jumpToNextKeyframe
Jumps to the time specified by the next keyframe in all defined animations.AnimationDirectorName jumpToPreviousBreakEvent
Jumps to the time specified by the previous keyframe of the Break Event animation.AnimationDirectorName jumpToNextBreakEvent
Jumps to the time specified by the next keyframe of the Break Event animation.AnimationDirectorName jumpToPreviousSnapshotEvent
Jumps to the time specified by the previous keyframe of the Snapshot Event animation.AnimationDirectorName jumpToNextSnapshotEvent
Jumps to the time specified by the next keyframe of the Snapshot Event animation.AnimationDirectorName isCreatedFromDemoMaker
Returns true in case the Animation Director corresponds to an imported Demo Maker module.AnimationDirectorName addTclCallback <TclCallback>
Adds the given Tcl procedure name to the list of callbacks. The registered Tcl callbacks will be called each time the current time of the animation has changed. Using this mechanism, you will be able to react on current time updates to execute custom code and perform your own animation for instance. Example:proc animationDirectorCallback {} { set currentAnimationDirector [_animations getCurrentAnimationDirector] echo "Current time = [$currentAnimationDirector getCurrentTime] ms" }AnimationDirectorName removeTclCallback <TclCallback>
Removes the given Tcl procedure name to the list of callbacks.
The _animationsMovie command provides several options used to configure the embedded Movie Maker module.
_animationsMovie create
Will create a movie using the parameters specified in the Movie Creation Panel (accessible via theMovie Creation button).
For other commands on the movie creation options, please refer to the Tcl interface of the Movie Maker module.