Requirement: if no database is set, add a database
To repeat the same process on several data, the Iterate feature of BrainVISA is useful.
For more details about iteration of an importation process, see BrainVISA manual - Data importation
- Open the process Morphologist => import => Import T1 MRI.
- Click on the Iterate button.
- Fill in the input parameter with
 button:
- Select data_unprocessed/subject02/anatomy/subject02.ima.
- Click again on the icon to add the next image: data_unprocessed/subject03/anatomy/subject03.ima.
- Click Ok button to end the selection of input files.
- Fill in the output parameter with
 icon. This time, you have to give information for several images :
- Select a format: for example NIFTI-1 image; the images will be converted to this format in the database directory.
- Select the protocol created for the first importation: demo
- For the subject attribute, you have to give 2 different values for the 2 input images. Type in the subject field : subject02 subject03.
- Two suggested items appear in the right panel. Select the two items (Ctrl+click) and click the Ok button to accept.
- Click ok in the iteration dialog
- A new window named Import T1 MRI iteration appears. It is a pipeline containing an instance of the importation process for each images.
- Click Run button to start the process.

Requirement: Import several images.
Now, we are going to process the new MRI data for subject02 and subject03. It is possible to create an iteration of the Morphologist pipeline:
- Select the process Morphologist 2011
- Right-click to open a contextual menu and select Iterate
- Fill in the mri parameter with
 button and selects the Raw T1 MRI of subject02 and subject03.
 - Click ok button to generate the iteration
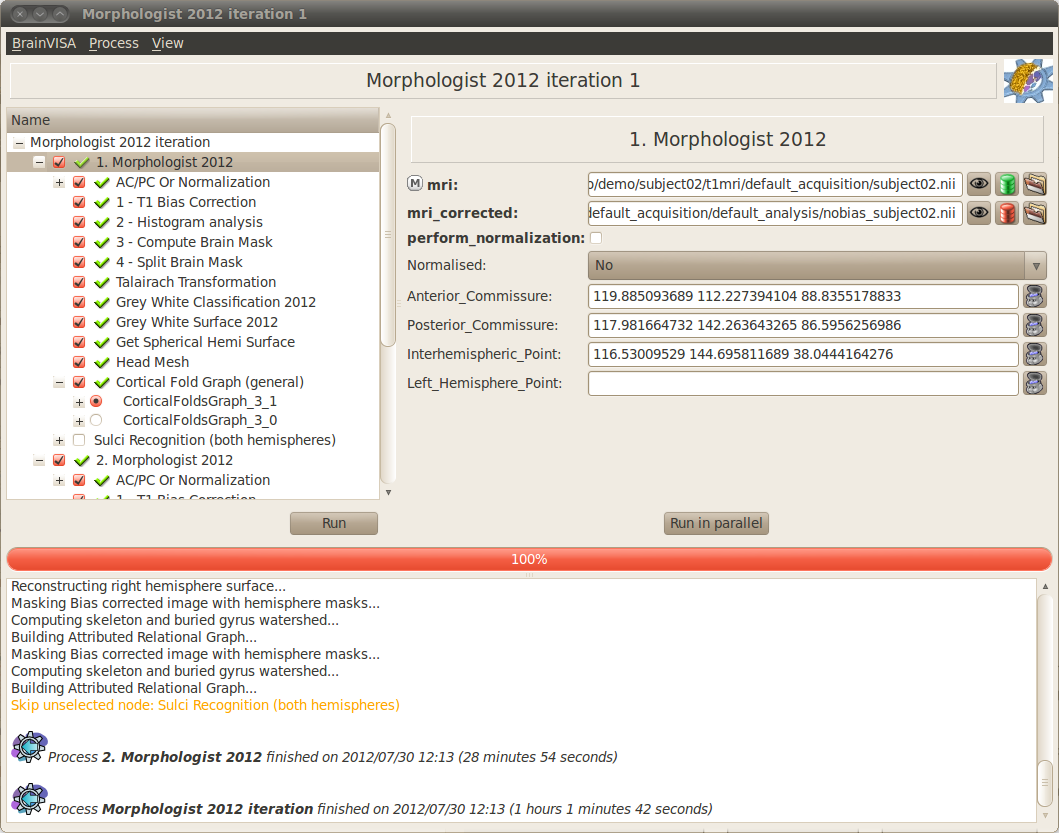
- For each instance of Morphologist in the iteration process, fill in the AC, PC, interhemispheric and left hemisphere points parameters.
- Start the iteration process by clicking on the Run button
Requirement: Morphologist pipeline to obtain sulci graph.
- Open the Morphologist pipeline window
- Check the box near the Sulci recognition step.
- Right-click to open the contextual menu and choose Unselect before to unselect all the previous steps that are already done.
- In the parameters panel of Sulci recognition process, select Statistical Parametric Anatomy Map (SPAM) for the model.
- Select Talairach for the spam_method parameter.
- Click on the Iterate button to open the Morphologist pipeline iteration parameters window.
- Fill in the mri parameter with button and selects the Raw T1 MRI of subject02 and subject03.
- Click ok button to generate the iteration
- Start the iteration process by clicking on the Run button
- When the process is finished, visualize the results.
Note
The steps and parameters that are selected in the first process window are reported in the generated iteration of processes. This way, you can fix the common parameters once instead of changing them in each generated process.

Requirement: Automatic sulci recognition iteration.
Exercise
Compute the mean depth of the left central sulcus for the 3 subjects of our database.
To do so, here are the steps to follow:
- Open the process Morphometry => Morphometry statistics.
- Select the input data_graphs with the button : choose the automatically labelled left cortical folds graphs of the 3 subjects in our database.
- Click on the button
 near the region parameter to select the sulci of interest.
 - A new Labels selector window opens. Select the sulcus named S.C._left in the list. Drag and drop it in the selection panel just below.
- Click on the Accept button to close the window.
- Choose the output_directory with the button : a directory where the results files will be written. For example, create a new directory named sulci_stats in your personal directory.
- Click Run button to start the process.
- Once the process is finished, go to the output directoy.
- Right-click on the .dat file and opens it with a spreadsheet software.
- The sofware should offer to cut the fields on the file into columns. Accept it.
- Compute sum( geodesicDepthMax - geodesicDepthMin )/3
